
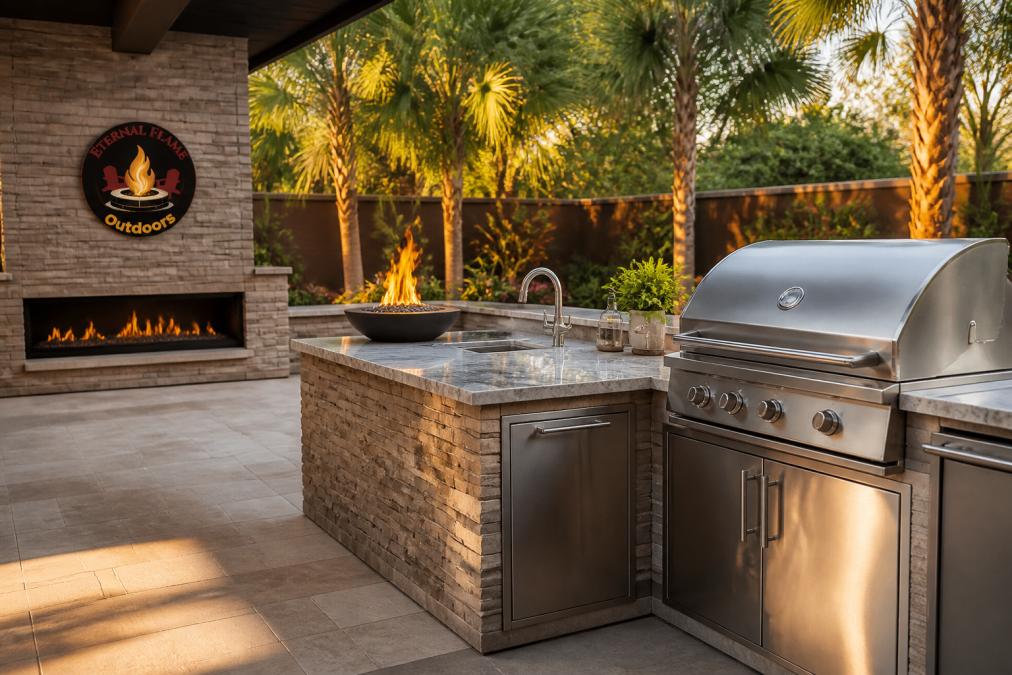
Best Outdoor Kitchen Layout Ideas for 2026
Table of Contents
- Understanding Outdoor Kitchen Layout Fundamentals
- L-Shaped Outdoor Kitchen Layouts
- U-Shaped Kitchen Designs for Maximum Prep Space
- Island-Style Kitchen Configurations
- Outdoor Kitchen Zone Planning for Efficient Workflow
- Outdoor Kitchen Appliance Placement and the Kitchen Triangle
- Small Outdoor Kitchen Layout Ideas for Compact Spaces
- Outdoor Kitchen Ventilation Requirements and Design
Last Updated: August 15, 2026
Understanding Outdoor Kitchen Layout Fundamentals
A strong outdoor kitchen layout combines cooking, prep, and serving zones into a cohesive flow that feels natural to use. The foundation of any successful design rests on understanding how people move through the space and what tasks happen where.
Think of your outdoor kitchen as a working kitchen that happens to be outside. The best designs follow the same principles as indoor kitchens: minimize unnecessary movement, group related functions together, and create clear zones for different activities. Whether you're designing a compact 12-by-15-foot patio or a sprawling backyard entertaining space, these principles remain constant.
The kitchen triangle concept, the imaginary line connecting your grill, prep station, and sink, originated in residential kitchen design and translates directly to outdoor spaces. A well-proportioned triangle keeps you from walking excessive distances between the three most-used areas. For outdoor kitchens, this triangle becomes even more important because you're often entertaining while cooking, and inefficient layouts force you to leave your guests to fetch tools or ingredients.
L-Shaped Outdoor Kitchen Layouts
An L-shaped outdoor kitchen layout maximizes counter space and creates a natural workflow without consuming your entire patio. This configuration positions the grill on one leg and prep surfaces on the other, forming a corner that feels intentional rather than cramped.
L-shaped designs excel at separating cooking from food preparation. Your grill occupies one wall while your sink, refrigerator, and counter space run perpendicular, creating distinct zones for different tasks. The corner becomes your natural hub, where a side burner or additional prep space lets you move smoothly between grilling and finishing dishes.
For smaller patios, an L-shaped layout often works better than a straight island because it uses corner space efficiently. A 12-foot-by-10-foot patio that couldn't accommodate a large straight island can often fit a comfortable L-shaped configuration. The Videl Maestro 134L and Maestro 112L represent this layout philosophy, with the 42-inch grill positioned to maximize the cooking surface while the extended counter leg provides genuine prep and serving space.

Ensure the corner isn't so tight that you can't access storage doors or drawers. A 30-inch depth works well for most patios, keeping the island close enough to be convenient while leaving adequate space to move behind it for maintenance or cleaning.
U-Shaped Kitchen Designs for Maximum Prep Space
A U-shaped outdoor kitchen layout wraps counter space around three sides, creating the most prep surface per square foot of any configuration. This design shines when entertaining is your priority and you need multiple people working simultaneously, one person grilling, another prepping, a third handling beverages.
U-shaped designs require more space than L-shaped or straight islands, but they deliver proportional benefits. The extra counter space means you can stage multiple dishes, keep ingredients organized, and maintain separate zones for raw and cooked foods without constant reorganization. The enclosed feeling also creates a natural gathering spot where guests can cluster around the kitchen while you cook.
The kitchen triangle works exceptionally well in U-shaped layouts. Your grill typically anchors one leg, the sink occupies another, and prep surfaces fill the remaining space. This arrangement minimizes backtracking and lets you move between tasks in a logical sequence.
Storage becomes abundant in U-shaped designs. The additional perimeter means more opportunities for cabinets, drawers, and refrigerated storage. You can dedicate one leg to cooking equipment, another to entertaining essentials, and a third to maintenance supplies.
The main drawback is space consumption. A U-shaped layout typically requires a 15-by-15-foot minimum to feel comfortable and maintain adequate traffic flow around the island.
Island-Style Kitchen Configurations
Island-style outdoor kitchens position all cooking and prep functions on a single freestanding island, creating a 360-degree work surface. This layout maximizes entertaining potential because guests can gather on all sides, watching you cook while enjoying drinks and conversation.
Island designs work best in larger patios where you have ample space on all sides. A 10-foot-by-10-foot island surrounded by 4 feet of clearance creates an inviting gathering space. The Videl Maestro 144L and Maestro 108I exemplify island configurations, with the grill as the centerpiece and supporting appliances arranged for efficient workflow.

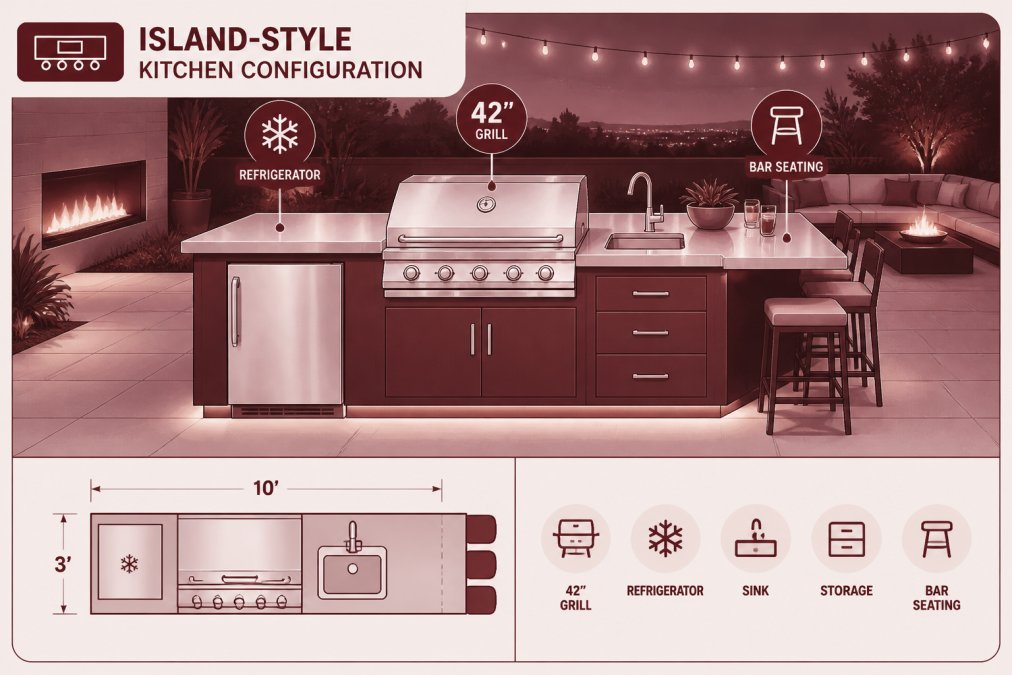
The key to successful island design is ensuring adequate circulation space. You need at least 3 feet of clearance on all sides for comfortable movement, and 4-5 feet is ideal if you expect multiple people to move around the island simultaneously. Island layouts excel at separating cooking from entertaining, allowing the chef to occupy the center while guests remain on the perimeter.
One consideration: islands require utilities on all sides or strategic placement near existing connections. If your water and gas lines run from one corner of your patio, you may need to run extended lines under or around the island, which adds cost and complexity.
Outdoor Kitchen Zone Planning for Efficient Workflow
Dividing your outdoor kitchen into distinct zones, prep, cooking, serving, and entertaining, creates natural workflow patterns that make the space feel intuitive to use. Zone planning ensures that each activity has a dedicated area with appropriate equipment and counter space.
The prep zone should include your sink, refrigerator, and cutting counter. Positioning the sink near the grill allows you to rinse vegetables, fill pots, and clean hands without walking across your entire patio. A 36-inch minimum counter width works for most prep zones, with 48 inches ideal if multiple people will prep simultaneously.
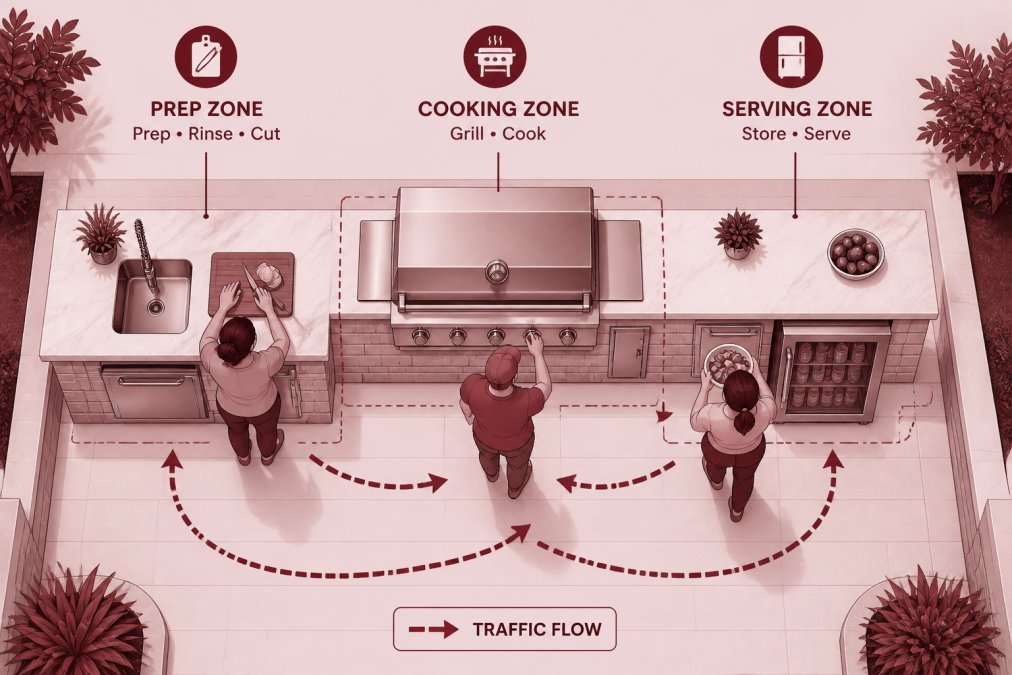
The cooking zone centers on your grill, with side burners and additional cooking surfaces positioned nearby. This zone should have at least 18 inches of counter space on each side of the grill for staging raw ingredients and finished dishes. Position the cooking zone away from high-traffic areas where guests might accidentally brush against hot surfaces.
The serving zone handles plating, keeping finished dishes warm, and presenting food to guests. This area typically includes counter space, a warming drawer or secondary grill surface, and easy access to the entertaining area. Many homeowners position this zone between the cooking and entertaining areas, creating a natural transition from kitchen to social space.
Efficient workflow means minimizing unnecessary movement. The distance between your prep zone and cooking zone should feel natural, close enough that you're not constantly walking back and forth, but far enough that heat and smoke from the grill don't affect food preparation. Generally, 4-6 feet between zones works well.
Outdoor Kitchen Appliance Placement and the Kitchen Triangle
The kitchen triangle principle, positioning your grill, sink, and prep area to minimize walking distance, remains the most practical guide for outdoor kitchen appliance placement. In outdoor kitchens, this triangle typically measures 10-15 feet per side, larger than indoor kitchens because outdoor spaces are naturally more expansive.
Your grill anchors one point of the triangle. Position the grill where smoke disperses naturally (away from seating areas and your home), where utility connections are accessible, and where you have adequate counter space on both sides for staging and finishing.
The sink occupies the second point. Proximity to the grill matters because you'll constantly move between them. A 6-8 foot distance between grill and sink feels natural. The prep station forms the third point, typically your refrigerator and cutting counter combined. Position prep surfaces where they're accessible from both the grill and sink, creating a logical triangle.
The Videl Maestro 112L demonstrates optimal triangle placement, with the 42-inch grill, double side burner, countertop sink, and refrigerator arranged to keep all three points within natural reaching and walking distance. Distance matters more than perfect geometry. A triangle with sides measuring 12, 14, and 15 feet works better than a perfect 12-by-12-by-12 triangle if the longer distances flow naturally with your patio layout.

Small Outdoor Kitchen Layout Ideas for Compact Spaces
Compact patios demand layout strategies that maximize functionality without overwhelming the space. A small outdoor kitchen layout can deliver surprising capability when designed thoughtfully.
Straight-line configurations work best for tight spaces. The Videl Luxe 64I Margarita Center and Luxe 64I Griddle exemplify compact designs that deliver full functionality in a 64-inch footprint. A straight line means you can fit a complete outdoor kitchen into a 12-by-10-foot patio without consuming the entire space, leaving room for seating and circulation.
Vertical storage becomes critical in small spaces. Tall cabinets, wall-mounted shelving, and overhead racks keep equipment accessible without consuming valuable counter space. Multi-function appliances make sense for compact layouts. A combination grill and side burner, or a griddle-grill hybrid, delivers cooking versatility without requiring separate equipment. The Videl Luxe 64I Griddle combines flat-top and burner cooking in a single unit, eliminating the need for separate appliances.
Beverage stations work exceptionally well in small spaces. The Margarita Center concept positions refrigeration and prep space for drinks, creating a distinct entertaining function without requiring full cooking infrastructure. Counter space becomes premium in small kitchens, every inch should serve multiple purposes.
Traffic flow matters more in small spaces. Ensure at least 3 feet of clearance around your kitchen island or configuration. If your patio can't accommodate 3 feet of clearance, consider a wall-mounted or corner configuration instead of a freestanding island.
Outdoor Kitchen Ventilation Requirements and Design
Proper ventilation transforms your outdoor kitchen from a smoky, uncomfortable space into a pleasant cooking environment. Ventilation removes smoke, heat, and cooking odors while protecting your home and surrounding structures from excessive heat exposure.
Natural ventilation through air circulation works for most outdoor kitchens. Position your grill where prevailing winds carry smoke away from seating areas and your home. If your patio is sheltered or wind patterns are inconsistent, mechanical ventilation becomes necessary.
A ventilation hood or range hood above your grill accelerates smoke removal and captures heat before it spreads across your patio. Hoods work best when positioned 24-30 inches above the grill surface. An 800-900 CFM (cubic feet per minute) capacity handles most residential grills effectively.
Ductwork should slope slightly downward to prevent condensation accumulation and should be insulated if it passes through unconditioned spaces. Heat management extends beyond smoke. A properly designed outdoor kitchen maintains comfortable ambient temperatures even when the grill is running at full capacity. Spacing the grill away from seating areas (at least 8-10 feet) and using natural airflow helps dissipate heat.
Backsplash and surrounding materials should be heat-resistant. Stone veneer, stainless steel, or other non-combustible materials protect against heat damage. Materials within 3 feet of the grill should have fire-resistant properties, particularly if they're exposed to direct radiant heat.
Local building codes often specify ventilation requirements for outdoor kitchens, particularly if the kitchen is covered or partially enclosed. Check with your local building department before finalizing your design, as some jurisdictions require permits for outdoor kitchens with gas connections or permanent structures.
Creating the best outdoor kitchen layout for your space means balancing cooking functionality with entertaining appeal, matching your design to your patio's constraints, and ensuring the workflow feels natural rather than forced. Whether you're working with a sprawling backyard or a compact patio, the principles remain consistent: define your zones, position appliances for efficient workflow, and design with your guests in mind.
At Eternal Flame Outdoors, we work with homeowners and designers to translate layout principles into finished outdoor kitchens that deliver both performance and style. Our curated selection of premium outdoor kitchen islands, from the compact Videl Luxe 64I series to the expansive Maestro 144L, represents thoughtful design that prioritizes functionality.
Ready to transform your patio into a sophisticated outdoor entertaining destination? Explore our complete collection of outdoor kitchen islands and reach out to our team for personalized layout guidance. We'll help you design a space that inspires connection, makes cooking a pleasure, and becomes the centerpiece of your outdoor living experience.
Frequently Asked Questions
What is the best outdoor kitchen layout for entertaining?
The best outdoor kitchen layout depends on your space and entertaining style. L-shaped and island configurations work well for hosting because they create natural gathering points and separate cooking from dining areas. An island layout positions the grill as a focal point where guests can watch you cook, while an L-shaped design maximizes counter space for food prep and serving. Consider your lot size, traffic flow, and whether you want the cook to face guests or face away while grilling.
How do you plan outdoor kitchen zone planning for efficient workflow?
Outdoor kitchen zone planning organizes your space into three functional areas: prep (where you cut and assemble ingredients), cooking (where your grill and burners are), and serving (where plated food waits). Position these zones to follow a logical sequence, with the refrigerator near prep, the grill in the center, and a serving counter or bar at the end. This arrangement minimizes steps and keeps traffic flowing smoothly during meal preparation and entertaining.
What are common mistakes when designing an outdoor kitchen layout?
Common mistakes include placing the grill too close to the house or seating area (creating heat and smoke issues), insufficient counter space for food prep, poor drainage that causes water pooling, inadequate storage leading to cluttered surfaces, and ignoring ventilation requirements. Many homeowners also underestimate how much space they need or fail to account for utilities like gas lines and electrical outlets before installation. Planning around the kitchen triangle and local building codes prevents costly redesigns.
What outdoor kitchen appliance placement works best for small spaces?
For small outdoor kitchen layout ideas, choose a straight or L-shaped configuration rather than U-shaped. Position your primary grill as the centerpiece, add a compact refrigerator and sink nearby, and use vertical storage to maximize efficiency. Consider a margarita center or beverage station instead of a full second grill if space is tight. Modular islands like the Videl Luxe 64I Margarita Center or Griddle option provide complete functionality in a condensed footprint without sacrificing entertaining capacity.

Leave a comment
This site is protected by hCaptcha and the hCaptcha Privacy Policy and Terms of Service apply.