
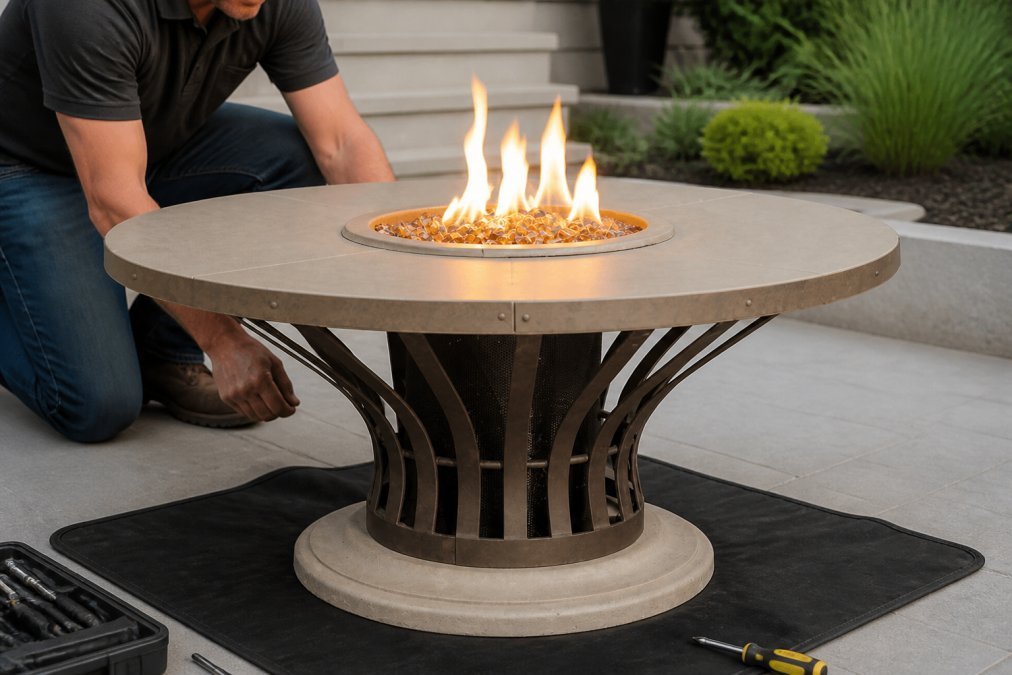
How to Safely Install a Gas Fire Pit
Table of Contents
- What You'll Need Before Starting
- Understanding Permits and Local Installation Codes
- Gas Fire Pit Clearance Requirements and Safety Distances
- Natural Gas vs Propane Fire Pit Installation Differences
- Gas Fire Pit Burner Installation Tools and Connections
- Outdoor Gas Fire Pit Ventilation Rules and Best Practices
- Testing, Safety Checks, and Troubleshooting Common Errors
- Conclusion
Last Updated: August 25, 2026
What You'll Need Before Starting
Installing a gas fire pit safely requires more than just connecting a hose. Gather essential tools: adjustable wrenches, a pipe wrench, pipe thread sealant (PTFE tape or pipe dope), and a leak detection solution. You'll also need your gas line (flexible hose, rigid copper, or black iron pipe), fittings, couplings, and a regulator matched to your fuel type.
Safety equipment is equally important. Wear work gloves, keep a fire extinguisher rated for gas fires nearby, and have your phone accessible. Most critically, obtain the manufacturer's manual for your specific fire pit burner before starting, it contains essential specifications about clearance, BTU ratings, and connection points.
Decide whether you'll hard-pipe (permanent copper or black iron) or use flexible gas lines. Hard piping requires soldering skills and is often code-required for natural gas, while flexible lines are simpler but may have length and exposure restrictions depending on local codes.
Understanding Permits and Local Installation Codes
Skipping permits isn't just risky, it can void your warranty, create liability issues, and result in fines during home inspections or insurance claims.
Local building codes govern gas fire pit installation because improper work creates real hazards: gas leaks, carbon monoxide accumulation, and fire risks. Requirements vary by jurisdiction regarding gas piping type, clearance distances, ventilation, and whether only licensed professionals can perform the work.
Contact your local building department and ask specifically about:
- Whether a permit is required
- Whether you can do the work yourself or need a licensed contractor
- What type of gas piping is required (hard pipe vs. flexible line)
- Clearance requirements from structures and combustible materials
- Ventilation requirements
- Whether pressure testing is required
Many areas also require notification to your gas utility before installation. This protects you by identifying main line locations and verifying your installation meets their standards before gas is connected.
According to the National Fuel Gas Code (NFPA 54), all gas-fired appliances must be installed in accordance with manufacturer's instructions and local codes.
Gas Fire Pit Clearance Requirements and Safety Distances
Clearance is a safety requirement based on how heat disperses from an active flame. Improper clearance can ignite nearby materials or damage structures.
Your gas fire pit burner must be at least 10 feet away from any structure, including your house, garage, deck railings, or overhead structures like pergolas (nfpa.org). This distance can vary based on local codes and your burner's BTU output. Check your local codes and fire pit manual for exact requirements.
You cannot install a gas fire pit directly on wooden decks without proper protection. Create a non-combustible base (concrete pad or metal frame with fire-rated materials) or relocate to a patio or ground-level area with non-combustible surfaces. Maintain required clearance from the deck structure itself.
Overhead clearance should be at least 12 feet to prevent heat damage and fire risk. Trim low-hanging branches well beyond this distance. Side clearance to windows and doors should be at least 3 feet, and never place the fire pit directly outside a bedroom window.
Natural Gas vs Propane Fire Pit Installation Differences
Your fuel type determines piping, regulator, and safety considerations. Switching between them isn't simple.
Natural gas lines come from your municipal utility and typically require hard piping (copper or black iron). Most jurisdictions require a licensed plumber or gas fitter for this work. The advantage is continuous fuel supply; the disadvantage is higher installation cost and professional labor requirements.
Propane uses a tank (portable or permanent) and offers installation flexibility since you don't need utility lines. The downside is monitoring tank levels and arranging refills. Propane regulators differ from natural gas regulators, and burner orifices may need adjustment if switching fuels.
The regulator is critical. A natural gas regulator maintains pressure around 4-7 inches of water column, while propane typically maintains higher pressure. Using the wrong regulator creates either fuel starvation or dangerously high flame output. Never assume a regulator works with both fuels.
Connection fittings also differ. Natural gas piping often uses NPT (National Pipe Thread) fittings, while propane systems may use different standards. Always verify against your fire pit manufacturer's specifications and local code.
For natural gas, coordinate with your gas utility for final connection and inspection. Propane installations typically don't require utility involvement, but arrange with a propane supplier to fill your tank and verify system safety.
Gas Fire Pit Burner Installation Tools and Connections
Precision matters here. A loose connection or improper fitting can lead to gas leaks.
Lay out all components before tightening anything. Identify the main gas supply line, regulator, burner assembly, and all connecting hoses or pipes. Most modern fire pits use flexible gas line combined with rigid fittings.
Hand-tighten first, then use a wrench to turn an additional quarter to half turn. Over-tightening can strip threads or damage fittings. The goal is a leak-proof seal without damaging the connection.
Use pipe sealant on threaded connections. Wrap PTFE tape around male threads clockwise, overlapping slightly, typically three to four wraps. Alternatively, pipe dope (liquid thread sealant) works well for gas connections. Never use both tape and dope on the same connection.
For the regulator connection, ensure you're using the correct regulator for your fuel type. This connection must be absolutely secure. Tighten firmly but not excessively.
The burner connection requires careful attention to manufacturer specifications. Some burners use quick-disconnect fittings; others use threaded connections. Follow the manual exactly.
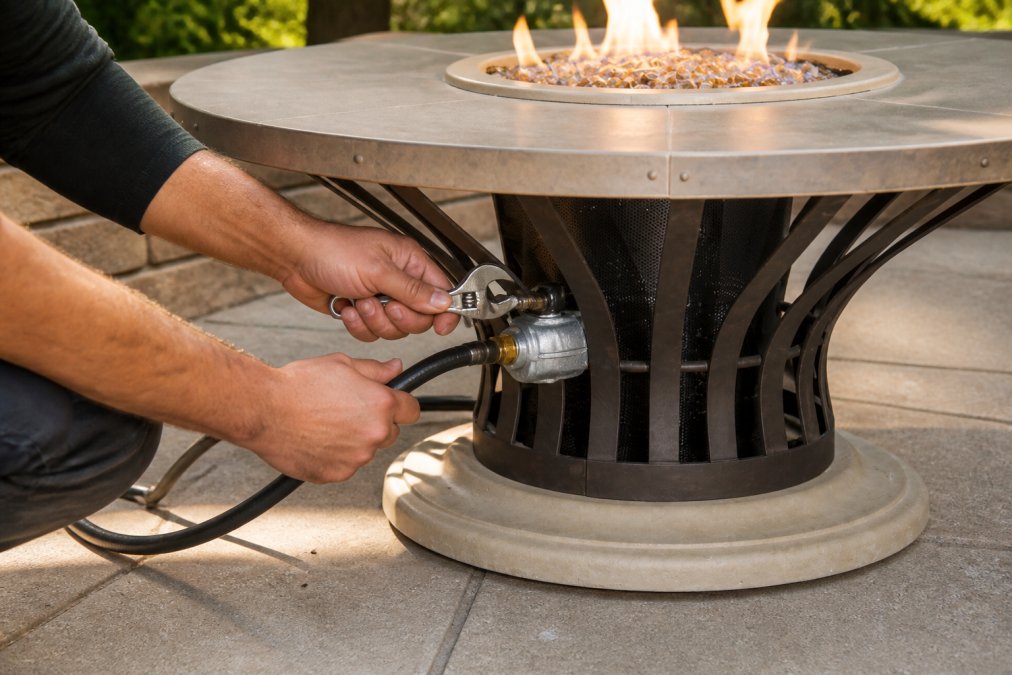
After hand-tightening and sealing, use two wrenches to tighten each fitting, one holding the fitting body while the other turns the nut. This prevents twisting that can damage the connection.
Flexible gas line connections need extra care. Route the hose away from sharp objects, protect from UV exposure if possible, and support at regular intervals (every 3-4 feet) to prevent sagging or kinking. Kinks restrict flow and damage the hose internally.
Outdoor Gas Fire Pit Ventilation Rules and Best Practices
Ventilation is critical for safety and performance. A gas fire pit without adequate ventilation can create carbon monoxide accumulation and incomplete combustion.
The primary requirement is that the fire pit is installed in an open outdoor space, not in an enclosed area like a garage, shed, or covered patio without adequate air exchange. If your fire pit is under a pergola or partial cover, there must be enough open space for combustion air to enter and exhaust gases to escape. Most codes require at least 50% of the area around the fire pit to be open to the atmosphere.
For ground-level installations, natural air circulation usually provides adequate ventilation. Wind and air movement naturally carry combustion gases away from the seating area. If your fire pit is in a low-lying area or surrounded by walls or dense landscaping, reposition it or remove obstructions.
If installed on a deck, ensure clearance underneath for air circulation. Solid skirting can trap heat and restrict airflow. Vented skirting or open space helps maintain proper ventilation.
The burner should be positioned to allow combustion air to reach it from below or the sides. Most manufactured fire pits are designed with this in mind, but custom installations need to account for it.
Smoke and combustion gases should disperse quickly. If smoke pools or lingers despite wind, reposition the fire pit or remove nearby obstructions. Position the fire pit so prevailing winds generally drift smoke away from seating areas.
For propane installations, position the tank away from the fire pit itself and in a location protected from direct sunlight and extreme heat. A small shade structure or landscaping can help while maintaining adequate ventilation.
According to the Consumer Product Safety Commission guidance on outdoor gas appliances, proper ventilation is essential to prevent carbon monoxide accumulation and ensure safe operation of any gas-fired outdoor equipment.
Testing, Safety Checks, and Troubleshooting Common Errors
Before lighting your fire pit for the first time, thorough testing is essential. A gas leak that goes undetected creates a dangerous situation.
Start with a visual inspection. Check every connection point for damage, corrosion, or misalignment. Look for cracks in the gas line, loose fittings, or debris near connections. Verify all fittings are hand-tight and sealant is visible at threaded connections. Inspect the burner assembly for damage and ensure it's properly seated.
Perform a leak test using a soap solution. Mix a few drops of dish soap with water in a spray bottle. With the gas supply on but the burner not ignited, spray the solution onto every connection point, fitting, and seam. Bubbles indicate a leak. If you see bubbles, turn off the gas immediately, tighten the connection slightly, and retest. If the leak persists, disconnect the fitting, reapply sealant, and reconnect.
For more thorough testing, use a commercial leak detection solution or have a professional perform a pressure test with specialized equipment.
Once you've confirmed there are no leaks, test the ignition system. If your fire pit has electronic ignition, ensure batteries are fresh and the ignition button produces a spark. If it has a pilot light, follow manufacturer's instructions for lighting it.
Light the main burner and observe the flame. It should ignite smoothly and burn with a steady, blue flame. Yellow or orange flames indicate incomplete combustion, which can result from low gas pressure, a clogged burner orifice, or air in the gas line.
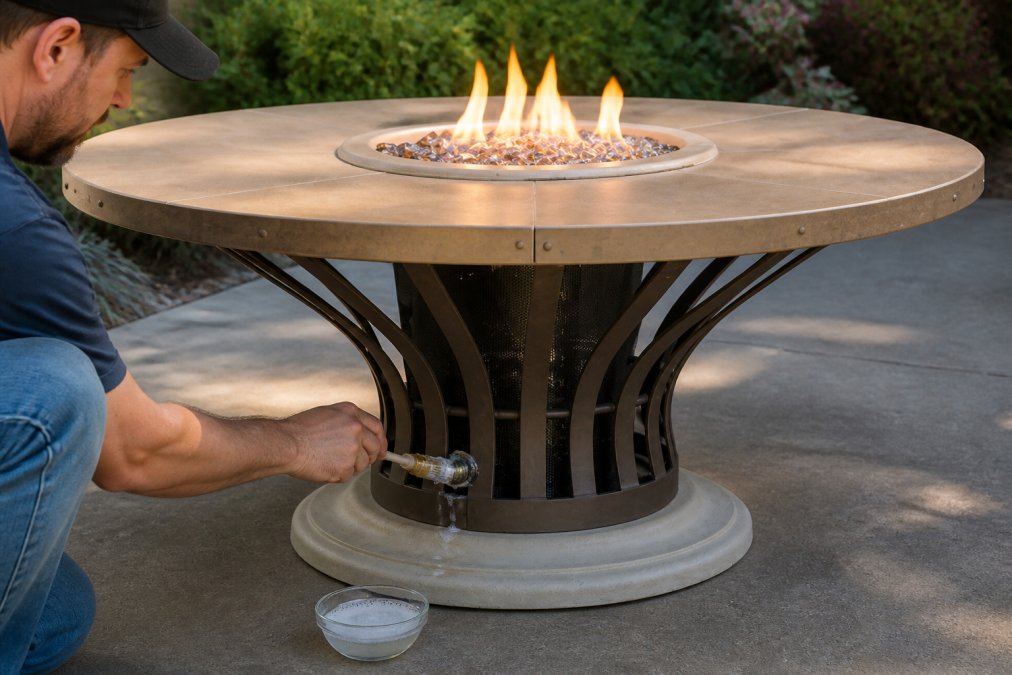
Common installation errors include:
Over-tightening connections: This can strip threads or crush fittings, creating leaks later. Hand-tighten plus a quarter turn is usually sufficient.
Forgetting sealant on threaded connections: Every threaded connection needs PTFE tape or pipe dope.
Using the wrong regulator: A propane regulator won't work properly with natural gas, and vice versa.
Inadequate clearance from combustible materials: Placing the fire pit too close to wood, fabric, or other flammable materials creates a fire hazard.
Kinked or crushed gas lines: This restricts gas flow and damages the line internally. Route hoses carefully and support them to prevent sagging or kinking.
Improper burner positioning: The burner must sit level in its housing with adequate combustion air access. Tilted or misaligned burners produce uneven flames.
Forgetting to bleed air from the line: After connecting a new gas line, trapped air causes weak flames or ignition problems. Bleed the line by opening the valve briefly before fully lighting the burner.
If your fire pit doesn't light or produces weak flames, work through this sequence:
- Verify that gas is reaching the burner (listen for a hissing sound when the valve is open)
- Check that the burner orifice isn't clogged with debris
- Ensure the ignition system is working
- Confirm that all connections are tight and not leaking
- Verify that the gas supply valve is fully open
- If using propane, check that the tank has fuel
If problems persist, consult the manufacturer's manual or contact a professional gas fitter.
Installing a gas fire pit safely requires patience, attention to detail, and respect for local codes. The process isn't complicated, but it demands precision at every step, from securing the right permits to testing connections before ignition.
At Eternal Flame Outdoors, we understand that many homeowners want to create their own fire pit experience. Whether you're working with natural gas or propane, the principles remain the same: follow your local codes, use proper materials and sealants, maintain required clearances, and test thoroughly before use.
If you're ready to invest in a quality fire pit, explore our curated selection of premium fire tables and burners from trusted brands like American Fyre Designs and True Flame. For example, the American Fyre Designs Fiesta Propane Fire Table - Cafe Blanco Finish at $3,700.00 offers elegance and utility, or consider the American Fyre Designs Cafe Blanco 32" Fire Bowl for $2,775.00 for a stunning centerpiece. Don't forget essential accessories like True Flame 1"-2" Lava Rock for $105.00 to enhance the natural appearance of your fire pit. Our team can guide you through the selection process and provide expert advice on installation requirements for your specific situation. For personalized assistance or to discuss custom installations, reach out to Eternal Flame Outdoors, we're here to help you create a safe, beautiful outdoor gathering space that you'll enjoy for years to come.


Frequently Asked Questions
Q: Do I need a professional to install a gas fire pit?
A: For simple propane fire tables, many homeowners can handle installation with proper research and tools. However, natural gas line installations require a licensed plumber or gas technician in most jurisdictions. Hard piping and connections to your home's gas supply must meet local codes. If you're unsure about any step, hiring a professional ensures safety and code compliance. Eternal Flame Outdoors can guide you through the process and provide expert advice on installation requirements for your specific situation.
Q: What are the clearance requirements for a gas fire pit?
A: Most fire pits require 10 feet of clearance from structures, overhanging branches, and combustible materials. Some jurisdictions require 15 feet. Always check your local building codes before installation. The clearance applies in all directions from the fire bowl or burner. Propane tanks must be positioned at least 10 feet away from any opening into the home. Proper clearance prevents accidental fires and ensures adequate ventilation around the feature.
Q: Can I install a natural gas fire pit on a wooden deck?
A: Not directly on untreated wood. If your deck is made of combustible materials, you must install the fire pit on a non-combustible surface like concrete, stone, or metal. Build a concrete pad or use fire-rated materials beneath the fire pit. Natural gas fire pits generate significant heat, and wood decks pose a serious fire hazard. Check your local codes, as many jurisdictions prohibit fire features on wooden decks entirely. A permanent concrete foundation is the safest approach.
Q: What's the difference between installing propane and natural gas fire pits?
A: Propane fire pits use portable tanks or hard-piped permanent tanks positioned away from the feature. Natural gas connects directly to your home's gas line, requiring a licensed plumber to run hard piping and meet code. Propane requires a regulator and shut-off valve near the tank; natural gas uses inline regulators. Propane is easier for DIY installation on portable models, while natural gas demands professional installation and permits. Both require pressure testing and leak detection before use.

Leave a comment
This site is protected by hCaptcha and the hCaptcha Privacy Policy and Terms of Service apply.