
Can You Hardwire an Electric Fireplace for a Clean Look?
Last Updated: October 30, 2026
Quick Summary
Yes, you can hardwire electric fireplace units for a clean, cord-free look, and many built-in linear models are designed for it. Hardwiring connects the fireplace to a dedicated circuit inside the wall, eliminating the visible cord and letting the unit sit flush.
- A hardwired fireplace should run on its own dedicated circuit serving only the fireplace.
- Read the nameplate for voltage, wattage, and amperage before finalizing your wall plan.
- A 1,500-watt unit on 120V draws about 12.5 amps; 2,500 watts on 240V draws roughly 10.4 amps.
- Never bury a plug, splice, or junction box behind a permanently sealed wall or surround.
- The Dimplex Ignite Evolve 60-inch model measures 61¼ inches wide, 16½ inches high, and 5¾ inches deep.
Table of Contents
- Hardwired vs. Plug-In: Which Gives the Cleanest Finish?
- Electric Fireplace Dedicated Circuit Requirements
- Electric fireplace outlet placement for a concealed connection
- Step 1: Plan the Opening and Confirm Your Measurements
- Step 2: Run the Wiring and Prep the Connection
- Step 3: Set the Insert, Verify Power, and Finish the Surround
- How to Hide Electric Fireplace Cords When Hardwiring Isn't an Option
- When to Call a Licensed Electrician (and What to Ask)
- Frequently Asked Questions
Hardwired vs. Plug-In: Which Gives the Cleanest Finish?
If you want a truly cord-free look, a hardwire electric fireplace wins over a plug-in every time. Hardwiring removes the visible power cord and lets the unit sit flush in the wall. The short answer: yes, you can hardwire an electric fireplace for a clean look, and many built-in linear models are designed for it.
Most people assume the difference is just hiding a cord. It isn't, it's where power enters the unit and how the wall gets finished around it.
What Hardwiring Actually Changes
Hardwiring means the fireplace connects to a dedicated power source inside the wall instead of plugging into an outlet. There is no cord to route, no plug to conceal, and no gap behind the surround.
A plug-in model needs a nearby outlet and a cord path, which usually shows up somewhere: along the baseboard, down the side of the surround, or through a visible grommet.
Electric Fireplace Dedicated Circuit Requirements
A hardwired electric fireplace should run on its own dedicated circuit, a breaker that serves only the fireplace. Sharing a circuit with outlets, lights, or appliances invites nuisance trips, especially at higher heat settings, and complicates future service work.
The exact circuit specification depends on the model and voltage. This is where the nameplate matters more than any general rule.
Reading the Nameplate Before You Buy
Every electric fireplace carries a nameplate or rating label listing voltage, wattage, and amperage. Read it before you finalize the wall plan.
- Voltage: many units run on 120V and can also be configured for 240V
- Wattage: higher wattage means more heat output and more current draw
- Amperage: the number your electrician uses to size the circuit and breaker
For example, the Dimplex Ignite Evolve supports both 120V and 240V operation, with up to 2,500 watts at 240V. The IgniteXL is also rated for 120V or 240V installation.
Do not size a circuit from a blog post. Size it from the label on your unit.
How Wattage and Amperage Drive Breaker and Wire Sizing
The math is simple: amperage equals wattage divided by voltage. A 1,500-watt unit on a 120V circuit draws about 12.5 amps; a 2,500-watt unit on a 240V circuit draws roughly 10.4 amps.
That is why the same fireplace can call for different breakers depending on configuration. The exact wire gauge, breaker size, and conductor type must come from the manufacturer's installation instructions and the electrician's load calculation, not from a rule of thumb.
A few practical points that follow from the math:
- Continuous load matters. A fireplace running for hours is treated differently than a device that cycles on briefly. Electricians apply the appropriate continuous-load factor when sizing the breaker and conductor.
- Voltage configuration is a choice, not a default. If the unit supports both 120V and 240V, decide early. A plug kit offers an alternative to hardwiring your linear fireplace. Switching later means re-running cable and possibly changing the breaker.
- Heat-off mode still draws power. The flame effect, controls, and any heater blower all pull current, so the circuit must be sized for the unit's full rated draw, not just the heater.
Can a Fireplace Share a Circuit?
Sometimes, but rarely cleanly. A low-wattage unit used primarily for flame effect with the heater off may fit on a shared circuit, but the moment the heater kicks on at full output, the combined load can exceed the breaker's rating and trip it, usually during a gathering.
The safer default is a dedicated circuit. It removes the guesswork, protects other devices, and gives the electrician a clean, code-compliant installation to sign off on.
What the Electrician Will Confirm
When the electrician arrives, they will verify the nameplate rating, calculate the load, select the breaker and conductor size, confirm the circuit is dedicated, and check that the cable route is protected where it passes through framing or masonry. They will also confirm whether a permit and inspection are required in your jurisdiction.
The nameplate numbers drive every circuit decision, so here are the key figures and rules the article lays out.
| Item | Value | Note |
|---|---|---|
| Circuit type | Dedicated circuit | Breaker serves only the fireplace |
| Voltage options | 120V or 240V | Many units can be configured either way |
| Dimplex Ignite Evolve | Up to 2,500 watts at 240V | Supports both 120V and 240V |
| Dimplex IgniteXL | 120V or 240V | Rated for either installation |
| 1,500W on 120V | About 12.5 amps | Amperage equals wattage divided by voltage |
| 2,500W on 240V | Roughly 10.4 amps | Comparable heat, different circuit design |
| Heat-off mode | Still draws power | Size circuit for full rated draw |
| Shared circuit | Rarely clean | Heater at full output can trip breaker |
Electric fireplace outlet placement for a concealed connection
Electric fireplace outlet placement is the decision that makes or breaks a cord-free finish. Get it right and the cord disappears. Get it wrong and you are patching drywall later.
The cleanest approach is usually to skip the outlet entirely and hardwire the electric fireplace. When that isn't possible, the outlet needs to land inside the wall cavity or inside an adjacent cabinet, never on the finished face of the surround.
Plan Around Three Fixed Points
Plan the outlet or junction location around three things:
- The fireplace's power entry point, usually at the back or bottom of the unit. The connection must reach it without a sharp bend or a strained cord.
- The depth of the wall cavity behind the surround. A shallow 2-by-4 wall leaves little room for a box and a plug; a deeper chase or a framed-out surround gives you options.
- Service access, so someone can reach the connection later without demolition. This is the point most DIY plans skip.
The Service-Access Rule
Any connection that could need attention, a plug, a junction box, a splice, must remain reachable. Burying a plug behind a sealed surround looks fine on installation day and fails on service day.
For a hardwired unit, the fireplace itself typically serves as the point of connection, and the manufacturer's instructions govern how the cable enters the unit and whether a separate junction box is required.
Protecting the Cable Route
A concealed route is only as good as its protection. Where the cable passes through framing, masonry, or a chase, it needs protection the local electrical code and manufacturer's instructions accept, running through the stud bay with proper securing and protection at penetrations, or using conduit through masonry or an exposed chase.
The route should also avoid sharp bends, staples driven too tight, and any path that strains the connection at the unit. A pinched or strained cable is a call-back waiting to happen.
Outlet Placement Options, Ranked by Cleanliness
When hardwiring is not possible, these placements deliver the closest thing to a cord-free look:
Ignite Evolve Built-in Linear Electric Fireplace →
- Recessed outlet inside the wall cavity, with an accessible service point. The plug sits inside the wall and the cord disappears into the cavity, while the connection stays reachable through an access panel or adjacent opening.
- Outlet in an adjacent cabinet or closet. The cord routes into a neighboring space and plugs in there, keeping the fireplace face clean.
- In-wall cord kit. A kit designed to route the cord through the wall to a remote outlet, used only where the manufacturer and local code allow it.
- Surface-mounted outlet with a painted cord cover. The least elegant option, but far better than a loose cord.
Whichever route you choose, confirm it against the fireplace's installation manual. Some manufacturers specify approved wiring methods and will not honor a warranty claim if the unit was connected in a way the manual does not permit. The manual is the final word on what your unit accepts.
Step 1: Plan the Opening and Confirm Your Measurements
Start with the fireplace's published dimensions, not the opening you wish you had. Rough-in framing decisions all flow from those numbers.
Measure the unit's overall width, height, and depth. Then add the clearance the manufacturer requires for framing and airflow.
Check these before you cut:
- Overall unit dimensions against your planned opening
- Framing depth versus wall depth, especially in a 2-by-4 wall
- Where the power connection enters the unit
An irregular opening, a stone chimney breast or an angled wall, needs extra care.
Also confirm the unit's clearance to a TV or mantel above.
Step 2: Run the Wiring and Prep the Connection
Now the electrical work. This is the step where a licensed electrician earns their keep, and where most DIY mistakes happen.
The wiring run goes from the breaker panel to the fireplace location, protected by the correct breaker size for the unit.
Prep work before the connection:
- Shut off power at the panel and confirm it with a voltage tester
- Strip wire ends cleanly with wire strippers, leaving enough length to work comfortably
- Confirm the cable jacket enters the box or unit connection point properly secured
Watch out: connecting a fireplace to a circuit that already feeds other loads is the single most common cause of repeated breaker trips.
Leave the final connection to a licensed electrician.
Step 3: Set the Insert, Verify Power, and Finish the Surround
With wiring in place, set the insert into the opening and secure it per the manufacturer's instructions. Then verify power before you close up the wall.
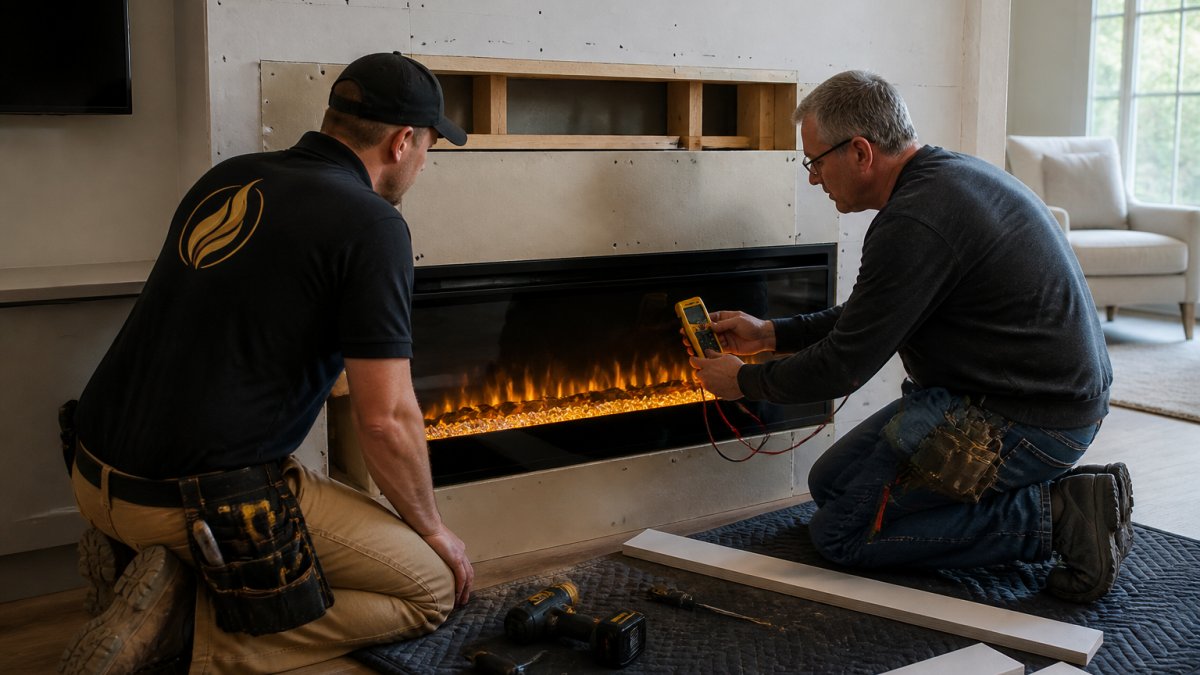
Power verification checklist:
- Restore the breaker and confirm the unit powers on
- Test the flame effect with heat off, then test heat separately
- Check the remote and any app controls
Once power checks out, finish the surround. This is where the clean look is won.
Seal gaps between the surround and the wall with the appropriate filler, then paint or finish to match. An electric insert needs no chimney or damper.
How to Hide Electric Fireplace Cords When Hardwiring Isn't an Option
Sometimes hardwiring isn't practical: a rental, a concrete wall, or a finished basement with no easy wire path. A plug-in firebox can still deliver a built-in look when hardwiring is off the table. You can still get close to a cord-free look.
Options that work, ranked by how clean they look:
- In-wall cord kit or recessed outlet. The plug sits inside the wall, and the cord disappears into the cavity.
- Adjacent cabinet or closet. Route the cord into a neighboring space and plug in there.
- Cord cover painted to match. The least elegant option, but far better than a loose cord.
- Furniture-grade grommet. A small, tidy pass-through beats a dangling cord.
When to Call a Licensed Electrician (and What to Ask)
Call a licensed electrician any time the work involves new wiring, a new breaker, or a connection inside a wall. For a deeper look at professional installation costs, see our electric vs gas cost breakdown.
Questions worth asking before they arrive:
- What circuit and breaker size does my unit's nameplate call for?
- Can the fireplace get a dedicated circuit?
- Will this need a permit and inspection?
Hardwiring an electric fireplace is a planning problem more than a technical one.
We can help you think through dimensions, hardwire options, and surround choices before you cut a single stud.
Frequently Asked Questions
Can an electric fireplace be hardwired instead of plugged in?
Yes. Many built-in linear models are designed for hardwire installation, including the Dimplex IgniteXL. Hardwiring removes the visible cord and lets the unit connect directly to a circuit, which is the usual route to a genuinely cord-free finish. Check the product listing and manual for your specific model before planning the electrical work, because not every fireplace supports a hardwired connection.
Does hardwiring an electric fireplace require a dedicated circuit?
A dedicated circuit is the safe default for a hardwired electric fireplace. Electric fireplace dedicated circuit requirements depend on the model's wattage and voltage: Because the fireplace is a fixed appliance that may run for hours, giving it its own breaker prevents tripping when other loads share the line. Confirm the circuit specification with a licensed electrician before wiring.
Can I hardwire an electric fireplace myself?
Only if you are qualified and your local rules allow it. Hardwiring involves running cable, making connections inside a junction box, and bonding the unit to a dedicated breaker, all of which fall under electrical codes that vary by jurisdiction. Most manufacturers and insurers expect a licensed electrician to handle the electrical connection. You can still manage the framing, opening preparation, and finish work yourself, then have the electrician run the circuit and verify the connection before the surround goes on.
Where should the electrical box go behind an electric fireplace?
Electric fireplace outlet placement should sit outside the insert's footprint but within reach of its connection point, typically in the cavity beside or above the firebox rather than directly behind it. The box needs to remain accessible for service and must not be buried behind finished material. Check the manual for the allowed connection zone, then have your electrician position the box so the wiring can be routed cleanly through the framed opening without pinching or crossing the unit's heat path.




Leave a comment
This site is protected by hCaptcha and the hCaptcha Privacy Policy and Terms of Service apply.