
Outdoor Kitchen Workflow and Zones: Planning Guide
Table of Contents
- Why Outdoor Kitchen Workflow Comes Before Appliances
- Outdoor Kitchen Layout Ideas That Support Real Cooking
- The Outdoor Kitchen Work Triangle, Adapted for the Patio
- Outdoor Kitchen Grill Placement and Appliance Positioning
- Designing the Outdoor Kitchen Prep Area and Cold Storage
- Workflow Walkthroughs for Three Common Cooking Scenarios
- Utilities, Clearances, and Common Planning Mistakes
- Frequently Asked Questions
Last Updated: October 15, 2026
Why Outdoor Kitchen Workflow Comes Before Appliances
An outdoor kitchen workflow is the sequence of movement a cook makes between cold storage, prep surface, the grill, and the serving area. Get it right and cooking outside feels effortless; get it wrong and you will walk miles during a single dinner party.
At Eternal Flame Outdoors, homeowners often pick their grill before drawing a single line on paper. That order is backwards, the appliance should fit the workflow, not the other way around.
How an Outdoor Kitchen Differs From an Indoor One
An indoor kitchen is a closed box with fixed walls and controlled light. An outdoor kitchen is an open plan with wind, sun, rain, and guests wandering through it. There is no wall to stop a gust from pushing a burner flame sideways, and no door to keep a curious guest out of the cooking zone, two facts that shape every layout decision that follows.
Outdoor Kitchen Layout Ideas That Support Real Cooking
The best outdoor kitchen layout lets you move between fridge, prep, grill, and guests without crossing your own path. Four configurations cover almost every patio.
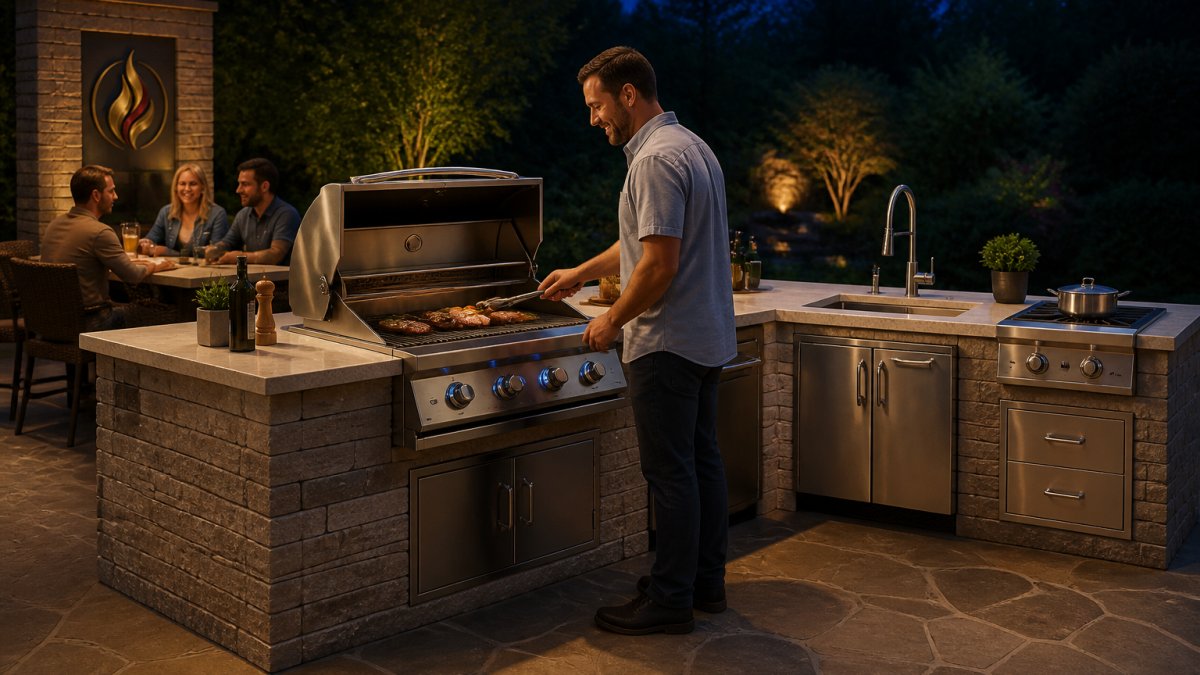
Linear, L-Shaped, Galley, and Island Configurations
- Linear: everything in one straight run. Best for narrow patios and simple menus.
- L-shaped: two runs meeting at a corner. Keeps the cook close to guests while separating work zones.
- Galley: two parallel runs facing each other. Efficient for serious cooking, but needs generous aisle space.
| Layout | Best For | Watch Out For |
|---|---|---|
| Linear | Narrow patios, small households | Long walks between appliances |
| L-shaped | Entertaining, corner patios | Dead corner storage |
| Galley | Frequent, heavy cooking | Cramped aisles |
| Island | Social cooking, large yards | Blocked traffic flow |
The Outdoor Kitchen Work Triangle, Adapted for the Patio
The work triangle is the distance between your refrigerator, prep sink, and primary cooking appliance. Indoors, designers keep those three points close so the cook never walks far. Outdoors, the same principle applies, with one addition: the guest zone.
A practical outdoor version keeps the three work points within a few steps of each other, then places seating and dining just outside that triangle.
Outdoor Kitchen Grill Placement and Appliance Positioning
Grill placement most affects how pleasant your outdoor kitchen feels to use. Put the grill where the cook faces the guests, not a wall, that one choice changes the entire social dynamic of the space.
Position the grill with clearance on both sides for landing space, the counter area where you set down a hot tray or platter. For a full island, our Videl Maestro 144L BBQ Island pairs a 42-inch built-in grill with a 30-inch griddle and a double side burner in a single 12-foot L-shaped run, keeping every cooking surface within arm's reach.

Designing the Outdoor Kitchen Prep Area and Cold Storage
The outdoor kitchen prep area is the counter space between cold storage and your cooking appliance. It should be the widest uninterrupted counter in the layout, because it is where you chop, season, plate, and stage everything.
Cold storage belongs at the entry point of the workflow, not the middle. Our Videl Maestro 112L BBQ Island combines a built-in sink, a compact refrigerator, and a 42-inch grill in one L-shaped footprint, the arrangement most homeowners land on after a walkthrough.

Workflow Walkthroughs for Three Common Cooking Scenarios
Most guides describe zones in the abstract. More useful is tracing the actual path a cook walks, step by step, for the meals you cook most often. Below are three scenarios mapped from storage to serving.
Scenario 1: Weeknight Dinner for Four
A simple grilled meal stresses speed and minimal steps.
- Storage. Pull proteins and produce from the refrigerator. If the fridge sits near the patio door, this is a single stop.
- Prep. Move to the prep counter, season, and trim. This should be the widest uninterrupted counter in the layout.
- Cook. Step to the grill. Landing space on both sides holds the tray and the tongs.
- Plate. Return to the prep counter or a dedicated plating surface adjacent to the grill.
- Serve. Hand plates to the dining area, which sits just outside the work triangle.
Total path: a few steps. A linear or small L-shaped layout handles this comfortably, and a compact island with a built-in grill and refrigerator keeps everything within arm's reach.
Scenario 2: Weekend Cookout for Twelve
This is where layouts fail: you are working the grill, griddle, and side burner at once while guests serve themselves.
- Storage. Load a cooler or refrigerator with drinks and sides. A second cold-storage point near the serving counter reduces trips.
- Prep. Stage everything on the widest counter before guests arrive. Batch prep is the difference between a calm cookout and chaos.
- Cook. Work the hot zone in a tight sequence: grill, griddle, side burner. Keep them adjacent so you never turn your back on the party.
- Hold. A warming drawer or covered landing area keeps finished food hot while the rest cooks.
- Serve. A serving counter set away from the hot zone lets guests help themselves without reaching past an open grill.
- Clean. A sink in the wet zone handles rinsing and trash staging without a trip inside.
An L-shaped or island layout with a dedicated serving counter earns its keep here. Place that counter on the opposite side of the hot zone from where guests enter.
Scenario 3: Holiday Gathering with a Fire Feature
Cooking wraps early and the party moves to the fire pit or fire table.
- Cook. Same hot-zone sequence as above, but plan for a shorter cooking window.
- Serve. Move plated food to the dining area.
- Transition. Guests migrate to the fire feature. The path from the patio door to the fire feature should bypass the grill and prep counter entirely.
- Linger. Seating around the fire feature should have clearance behind each seat so people can move without stepping into the fire ring.
If the fire feature sits on the far side of the cooking zone, guests will cut through your work area to reach it. Plan the path first, then place the fire feature.
Videl Maestro 144L - BBQ Island →
A Reusable Planning Tool
Before committing to a layout, sketch your patio to scale and draw the path for each scenario above. Mark the refrigerator, prep counter, grill, serving surface, and fire feature, then walk the sketch with a tape measure on the actual patio.
If you would like help translating a workflow into a specific island configuration, explore our outdoor kitchens and fire features, or contact our team for personalized guidance.
Utilities, Clearances, and Common Planning Mistakes
Utilities decide what is actually possible, so they belong in the first conversation, not the last. Gas, electrical, and water access all need to be roughed in before the island is built. A grill that needs a gas line run across a finished patio is a far bigger project than one planned with the line already in place.
Plan the Utility Sequence First
A practical order of operations looks like this:
- Confirm the fuel source. Natural gas requires a dedicated line sized for the total connected load of every burner, griddle, side burner, and fire feature you plan to run at once. Propane needs an accessible tank location, never stored inside an enclosed island cabinet.
- Map electrical needs. Ignition, interior and under-counter lighting, refrigerators, ice makers, kegerators, and outdoor-rated outlets each draw power. Plan a circuit that accounts for all of them together, not one at a time.
- Route water and drain. A prep sink needs a supply line and a drain path. In cold-winter regions, plan for winterization or a shutoff you can reach without dismantling the island.
- Leave service access. Every appliance needs a way to be reached for service. A built-in grill or refrigerator boxed in with no removable panel is a future demolition project.
Clearance and Dimension Guidance
The measurements below are the ranges most designers and builders work from. Treat them as planning targets, then confirm against your appliance manufacturer's installation manual and your local building code, which always govern.
| Element | Common Planning Range | Why It Matters |
|---|---|---|
| Aisle width, single cook | About 36 inches | Minimum comfortable passage |
| Aisle width, cook plus traffic behind | About 42 to 48 inches | Lets someone pass without crowding the cook |
| Landing space beside grill | About 12 to 18 inches each side | Safe spot for hot trays and platters |
| Counter height, standard | About 36 inches | Matches most built-in appliance specs |
| Counter height, seated bar | About 30 inches | Comfortable for stools at a raised counter |
| Raised bar overhang | About 12 to 15 inches | Knee room for seated guests |
| Seating clearance behind a stool | About 32 to 36 inches | Lets people push back and walk past |
| Grill lid clearance | Manufacturer spec, often 24 inches or more | Prevents lid contact with walls or cover |
A compact patio can work with narrower aisles if only one person cooks at a time. A layout built for entertaining should plan for the wider end of each range, because two people in the space is the normal condition, not the exception.
Separate Hot, Wet, and Guest Zones
Most outdoor kitchen injuries and frustrations come from mixing three zones that should stay distinct:
- Hot zone: grill, griddle, side burner, pizza oven, and any fire feature. Keep guests, children, and pets out of it, and never place a walkway directly behind a grill lid.
- Wet zone: sink, prep counter, and cleanup surface. Keep it adjacent to the hot zone so you are not carrying raw ingredients across a traffic path.
- Guest zone: serving counter, dining, and seating. Position it so guests approach the food without passing behind the cook or reaching over an open grill.
Smoke and heat follow prevailing wind. Orient the grill so smoke drifts away from seating, and avoid placing a fire feature directly upwind of where people gather.
Accessibility and Inclusive Design
A well-planned outdoor kitchen works for cooks of different heights and mobility levels:
- Keep at least one step-free route from the house to the cooking area.
- Provide a turning space of roughly 60 inches where a wheelchair or walker needs to reverse direction.
- Place the primary work surface within a comfortable reach range for the person who cooks most often.
Common Planning Mistakes
| Mistake | Fix | Why It Matters |
|---|---|---|
| Grill against a wall | Leave landing space both sides | Safe, comfortable serving |
| Fridge at the far end | Move it near the house entry | Fewer trips, less spoilage risk |
| No serving counter | Add a surface away from hot zones | Guests stay out of the cook's path |
| Ignoring wind direction | Orient the grill with prevailing wind in mind | Steadier flames, less smoke in faces |
| Skipping overhead cover | Plan shade or a pergola | Comfortable use in summer sun |
| No service access | Add removable panels | Future repairs stay simple |
When in doubt about clearances, gas sizing, or utility routing, confirm with a licensed contractor in your area rather than guessing. If you would like help matching appliances to your planned layout, our team can walk you through the options in our outdoor kitchens collection.
Frequently Asked Questions
What zones should an outdoor kitchen have?
A functional outdoor kitchen typically includes four zones: a cooking zone with the grill, griddle, or smoker; a prep zone with counter space and a sink; a cold storage and serving zone with a refrigerator and landing space; and a socializing area where guests gather. Keeping these zones distinct but close together lets you move through cooking tasks without crossing into guest traffic. Plan the cooking zone first, then build the prep and serving areas around it.
How do you plan an efficient outdoor kitchen workflow?
Start by listing how you actually cook: grilling only, or grilling plus sides and drinks. Then arrange appliances in the order you use them, usually refrigerator, prep counter and sink, grill, then serving space. Keep the distance between the cold storage, prep area, and grill short so you are not walking back and forth across the patio. A clear outdoor kitchen workflow reduces trips and keeps hot items away from where guests stand.
What is the best layout for an outdoor kitchen?
The best outdoor kitchen layout depends on your patio shape and how you entertain. A linear layout suits narrow patios and keeps everything in one run. An L-shaped layout wraps a corner and adds counter space without blocking traffic. A galley layout works in wider spaces with two facing counters, and an island layout anchors larger patios and doubles as a gathering spot. Match the layout to your available patio space and cooking habits rather than copying a photo.
How much space should you leave between outdoor kitchen appliances?
Leave enough landing space beside each appliance to set down hot pans, platters, and tools. The grill needs counter space on at least one side, and ideally both. The refrigerator needs room for the door to swing open fully, and the sink should sit between the prep counter and the cooking zone. Measure your actual appliance dimensions and door swings before finalizing the layout, since clearance needs vary by model.
Where should a grill go in an outdoor kitchen?
Place the grill at the center of the cooking zone, with counter space on both sides and away from the main walkway where guests pass. Keep it out of prevailing wind if possible, since wind affects burner performance and flare-ups. Position the grill so the cook faces the socializing area rather than turning their back on guests. On an L-shaped island, the corner often works well because it provides landing space on two sides.
How should an outdoor kitchen be arranged for food preparation and serving?
Arrange the prep and serving areas in the order food moves: take ingredients from the refrigerator, prep them at the sink and counter, cook at the grill, then set finished food on a serving counter near the dining or seating area. This one-directional flow keeps raw and cooked food separate and prevents bottlenecks. A dedicated outdoor kitchen prep area with a sink and generous counter space makes the biggest difference in how smoothly the whole process runs.
Planning an outdoor kitchen is really a planning problem, not a shopping problem, and the layout you choose will outlast every appliance in it. If you would rather not work it out alone, our team at Eternal Flame Outdoors can help you think through zones, clearances, and appliance placement before you commit. Browse our BBQ islands and outdoor kitchen collections, or contact us for personalized guidance on your space.

Leave a comment
This site is protected by hCaptcha and the hCaptcha Privacy Policy and Terms of Service apply.